General good practices
If you plan ahead and think beforehand about the organization and management of your data (and subsequently the results), everything else will follow. That way, even when your analysis is finished, you’ll be able to find necessary files much quicker.
To help you get started, we already listed some good practices. It is highly recommended to follow these.
Guideline 1: The structure of your directory
A key first step is to organize your directory structure properly. On your home directory, following this structure is recommended, while on the LTS, it is mandatory. Thus it is advised to do it already in your own home directory.
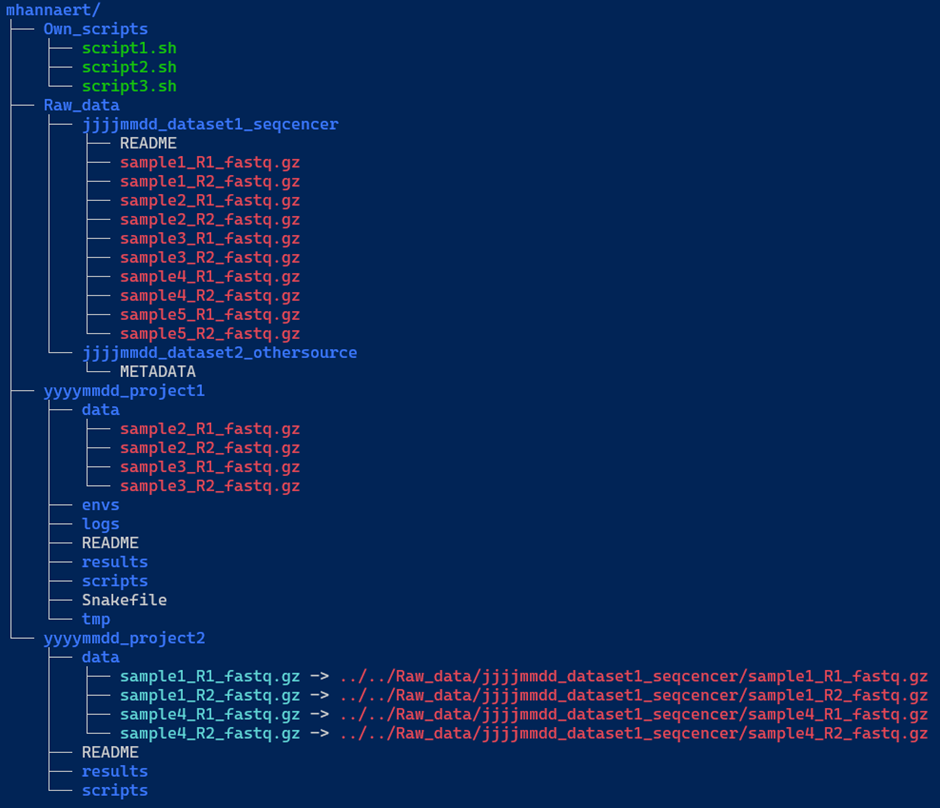
We included an example below (Figure 1) of a decent directory structure. The main folder (e.g. mhannaert) contains three key components:
Own_scripts/: A directory containing common scripts you’ve created to streamline your work in the terminal. These scripts should be general-purpose and not tied to any specific project.-
Raw_data/: This directory stores all raw datasets. Each dataset should be placed in a uniquely named subdirectory.Inside each dataset directory:
- Keep all raw data files as they were originally named.
- Include a metadata or README file with essential information such as:
- Details about the sequencer used.
- Reference genome information, including the full path to the reference genome on the server.
- Any other relevant metadata.
- Project directories: contain analysis-specific files and links to required data. For each project, a new directory is created, which also needs to be structured. We’ve given two examples here: one with a pipeline (
yyyymmdd_project1) and one without a pipeline (yyyymmdd_project2).
Again, we recommend to always include a README file, documenting the directory contents, data sources, and reference genome locations to ensure reproducibility.
Data links: symlinks vs hard links (and why it matters)
The data/ subdirectory in each project requires special attention. You’ll notice two colours in our example data samples:
- Blue filenames indicate symbolic links (symlinks) to the raw data. Each of these links:
- “points” to a file (in this case, raw data files)
- allows access to the files without duplicating them (saving storage space)
- will reflect any change made to the original files in the
Raw_data/directory
- Red filenames indicate hard links to your raw data. Each of these links:
- connects to the same data without duplicating storage
- looks and behaves like regular files
- (advanced) shares the same inode as the original file
Key difference: symlinks point to a file’s path, while hard links point directly to the file’s data.
When you modify a file through either a symlink or hard link, you’re changing the same underlying content.
#Making a hard link:
$ ln <path to original file> <path where you want the file>
#filled in example
$ ln /home/shared_data_medgen_bio-informatics/Incoming_data/*.fastq.gz /home/mhannaert/project_2/data/
#Making a symbolic link:
$ ln -s <path to original file> <path where you want the file>
#filled in example
$ ln -s /home/shared_data_medgen_bio-informatics/Incoming_data/*.fastq.gz /home/mhannaert/project_2/data/
Most important takeaway: DO NOT COPY DATA TO MULTIPLE LOCATIONS!
Instead, use links to keep data organized and easily accessible.
- An example of a good structure:
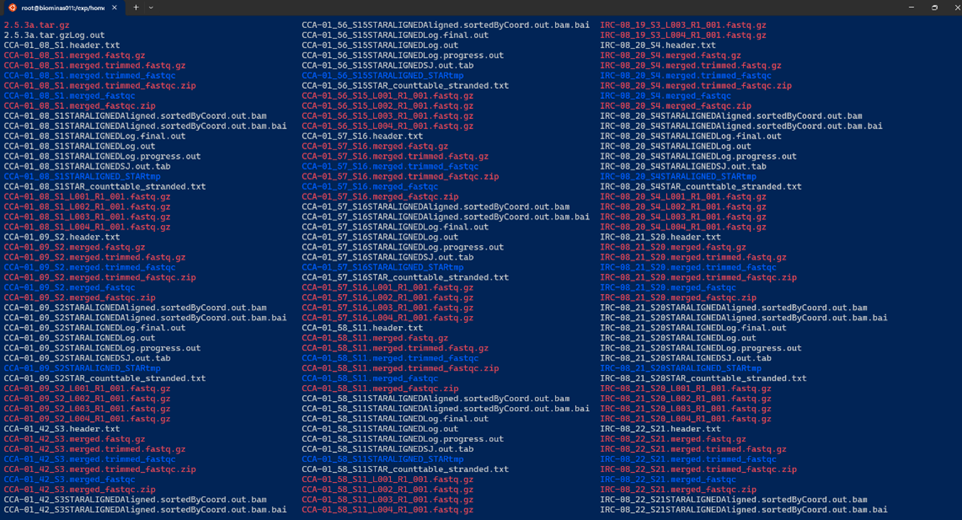
- An example of a bad directory “structure”:
Guideline 2: Think about your data management plan (DMP)
A data management plan is a formal document in which you outline how your research data will be handled during and after a project. It is important to ensure proper management, security, and accessibility for the future.
Creating a DMP before you even start with the collection of the data will save you time and frustration in the future — it’s not just a requirement for applying for FWO funding, but it’s a very valuable practice that benefits your entire research process.
Don’t fall into the “I’ll organise this later” trap: very often during pipeline/script development, you quickly create a large amount of temporary files (e.g. for testing, failed pipeline runs, etc.). Experience taught us that before you know it, you have to deal with overcrowded and chaotic directories, which take a lot of time to clean up and navigate.
By creating a clear DMP (in which you also state your directory structure rules), you will never run into this issue — at least if you stick to your own rules :-)
If you need some support on making your DMP you can contact Arvid or the UA RDM team: RDM-support@uantwerpen.be
Questions to answer before you start working on the server
Before you start working with your data on the server, make sure you can answer the following questions:
-
What kind of data will you collect, generate, and/or reuse?
Specify the data types (e.g. surveys, sequencing data, manuscripts, physical objects, etc.), the content type, the technical format (e.g..csv,.fastq,.pdf), and provide an estimate of the maximum expected data volume. -
Where will your data be stored?
Indicate the physical or digital storage location(s) you intend to use during the project. -
How will your data be backed up?
Describe the backup strategy and tools you will use to prevent data loss. -
Is there sufficient storage and backup capacity for the duration of the project?
If yes, briefly explain. If not, outline how you plan to ensure that adequate capacity will be made available. -
How will you ensure secure data storage?
Describe the measures in place to prevent unauthorized access, loss, or modification of your data. -
Will you use a metadata standard to make your data easier to find and reuse?
If yes, specify which standard(s) will be used (preferably per dataset or data type).
If no formal standard is applicable, describe the metadata you will provide to ensure your data remain understandable and reusable.
If you have trouble answering these questions, please contact us!
Guideline 3: Follow the FAIR principles
FAIR stands for:
-
Findable
Make your data and metadata easy to find (for both humans and computers). Use clear filenames and descriptive metadata so your data can easily be located through search tools. -
Accessible
Ensure clear access “pathways” to your data. This doesn’t require making data completely open or free for everyone — it means documenting how authorized users can retrieve it through clear instructions. -
Interoperable
Use standardised, open file formats that can easily be processed by different software systems. This makes data combinable and exchangeable with other data. Try also to use open-source software where possible. Datatypes we love arecsv,tsv, … -
Reusable
Make sure your data can be reused by other researchers efficiently, by making use of comprehensive metadata that explains what the data represents, how it was collected (sequenced), and how it should be handled. Proper documentation really maximises the long-term value of your research (data).
A good source of information for making your data FAIR is the ELIXIR FAIR cookbook.
Guideline 4: You don’t need to reinvent the wheel
Before investing (a lot of) time in developing custom code or workflows, try to investigate existing solutions.
Research communities all over the world have already created, validated, and optimized numerous data processing pipelines that can save you significant time and effort — some better documented than others :-)
Platforms like nf-core provide well-documented (and maintained!) bioinformatics pipelines. Resources like these not only speed up your analysis, but also ensure you comply with community standards (enhancing the FAIR-level of your analysis & results).
Keep in mind: when making use of existing materials, you should always document (in your metadata file for example) which version of the tool/pipeline you use — to ensure complete reproducibility.